Manufacturer Recommended PVC-Coated Conduit Installation
Properly installing a PVC-coated conduit system using manufacturer recommendations can ensure product service life. Below are suggested installation procedures to protect PVC-coated conduit exteriors and interiors systemwide against corrosion, along with details on obtaining installer certification.
Installation Procedures
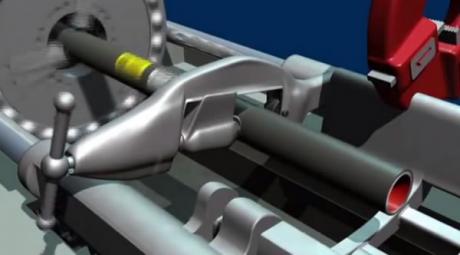
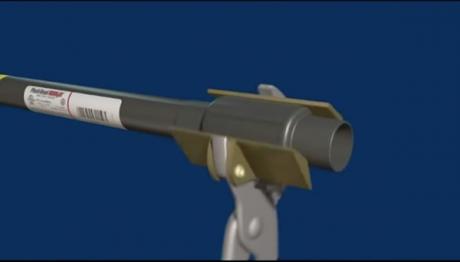
To use a pipe vise, replace the jaw assembly with special vise adapters. When using a chain vise for conduit diameters less than 2 inches, wrap the clamp area with emery cloth (coarse surface against the coating). To clamp a 2-inch diameter or larger PVC-coated conduit, use half-shell clamps. Should you use a power unit that spins the conduit, equip the chuck with inserts designed for coated conduit.

A roller cutter is recommended for PVC-coated conduit. This makes a square-cut end and removes about 1/4” of PVC coating, helping to thread the conduit. A hacksaw can also be used to cut conduit and requires a pencil cut so the die teeth engage the conduit.
By trimming 1/4” of the exterior coating the same way a pencil is sharpened, the pipe guide rides over the PVC coating. This facilitates coating removal and enables thread to be cut in one operation. A reamer is then used to remove rough, internal edges caused by cutting. This prevents insulation damage during wire pulling.
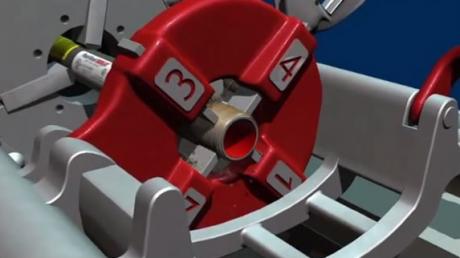
Prior to threading, make a series of cuts in the PVC along the conduit’s longitudinal axis. Use the thread protector at the end of each conduit section to gauge its length. These cuts help remove the PVC in small pieces rather than long strips. Longer pieces can foul the die head and cause the conduit to collapse.
A Longitudinal Axis is a direction of orientation, going from head to tail, passing through an object’s centroid or geometric center.
Also, machine the stationary guide to remove 0.12 inch before threading so the pipe guide rides up and over the PVC coating. Once finished, clean the threads and conduit interior with a degreasing spray to prepare for the application of the touch-up compound. This ensures proper adherence of the compound to the unprotected metal substrate.
Always use a new die head to thread coated aluminum. Using the same die head to thread PVC coated aluminum and coated rigid steel conduit is not recommended.
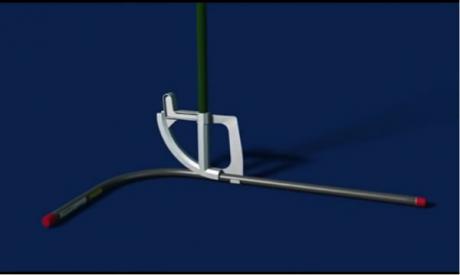
When using a conventional hand bender, use the next larger size of bending shoe to allow space for the coating. For sharp bends, saddles, or offsets, make hand bends with a special coated bending hickey to reduce the potential of damage to the coating. Installers typically use these tools for conduit 1/2” to 3/4” in diameter.
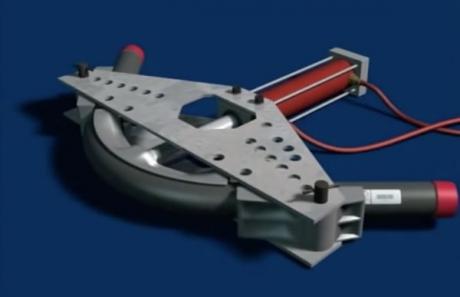
For best results, utilize equipment designed to bend coated conduit. Hydraulic and electric-powered benders are available with shoes sized for coated conduit. Use rubbing alcohol to clean the inside of the shoe and the bending area of the conduit. Conventional shoes can be used to bend conduit if 0.06 inches are removed from the inside surface to accommodate the coating thickness.
Never use lubricant in the shoe or on the conduit. Lubricant allows the conduit to slip above the centerline of the shoe, resulting in a flattening of the elbow.
Use special Z wrenches instead of standard adjustable pliers to assemble PVC coated conduit and fittings. Z wrenches spread the clamping force and allow a secure grip without damaging the conduit coating. Strap wrenches can be used to safely tighten conduit or couplings without harm to the coating.
To assemble smaller conduit sizes and fittings faster, use Spin-It tools with air impact or standard ratchet wrenches. This method never touches the PVC coating and eliminates time wasted on damage repairs.
Special sockets are available for use with ratchets to tighten encapsulated screws on conduit fittings, hangers and clamps.
PVC sleeves on conduit couplings and fittings isolate corrosives from the threads at the joints. Typically, sleeves should not be cut. However, when the fitting is close to other sleeves, such as the short nipple portion of the sleeve, it may become necessary. In this instance, cut away half of each sleeve and apply touch-up compound to the joints.
Manufacturer brands should not be mixed within an installation.
Obtaining Installer Certification
To ensure that PVC coated conduit is properly and successfully installed on a project, it is vital that all installers working on the project be certified per industry standards.
The benefits of a safe and successful installation:
- Owners/End-users receive optimum return on their investment through ongoing safety, lower maintenance/ repair costs and product service life longevity
- Professional users, such as specifiers and engineers, integrate the right product in their planning and provide added value to owners, end-users and contractors
- Contractors achieve a more cost-effective installation that limits the potential for liability and reduces risk for workers onsite
Installer certification is based upon classroom training and hands-on instruction that encompasses:
- Proper installation techniques and tools
- Hands-on instruction for clamping, cutting, threading, bending and PVC coated conduit assembly
- Interactive discussion of techniques and troubleshooting
Only installers who are able to present authorized unexpired credentials confirming instruction and examination are officially certified. Installer certification is free of charge and available at the job site, contractor’s shop, factory, or wherever it is convenient.